My love for chocolate runs deep. My Aunts Nancy and Marla showed me early in life what good chocolate was all about. There’s even a candy company in my family. My Aunt Rose and Uncle Dave had, in my opinion, the best chocolate in the country. Redstone Candy is a staple in Pennsylvania, you should check them out today.

I worked in a bakery in high school spending every Saturday and Sunday that I wasn’t playing in a volleyball or softball tournament cranking out cookies, croissants and quiches. I still kick myself for not writing down the recipes. Two pounds butter, 8 eggs, 2.5 pounds flour and that’s about it. I do remember the sugars; more brown sugar than white sugar was the key to soft and rich cookies. I’ve looked and looked for a recipe that is as good as Sweet Nick’s and this one is the closest I’ve ever come. It’s from The Girl Who Ate Everything. I love the first part of how she describes herself: I can’t be left alone with a warm cinnamon roll or chocolate chip cookie. She is totally describing me to a T.
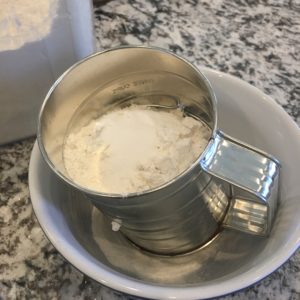
Take the time to melt then slightly cool the butter before you get started. If the butter is too warm, the batter will be affected. I learned this lesson when I tried to make them on a time crunch. Never again. While the butter is melting and cooling, sift the dry ingredients in a small bowl. Sifting the dry ingredients gives the right amount of fluff for perfectly structured cookies. I could eat these either way, batter by the spoonful or as a warm cookie. I haven’t tried these with nuts, I’m a purist of sorts and think nuts don’t belong in a chocolate chip cookie. If I were to add nuts, it would be 1/2 cup of pecans.

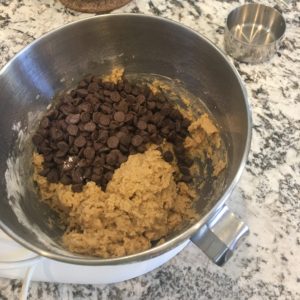
When the butter is slightly cooled, cream it with the sugars until light and fluffy. With the mixer on low, slowly add the flour and mix until just combined. Stir in chocolate chips by hand. I like my cookies on the small side, purely so I can eat six or eight and not feel bad, so I use a 1-tablespoon size scoop.



Bake in a 325 degree oven for 9-10 minutes for these smaller sized. If using a big, beefy scoop then bake for 11-14 minutes. Rotate the cookie sheets at halfway point. Do not over bake. Let sit on cookie sheet for one minute then fully cool.
 I don’t travel with my Kitchen Aid stand mixer but I do keep a hand-held one in the RV. I haven’t made these in the RV yet although it’s totally doable. It will just take a little longer because you can’t get three cookie sheets in either the regular oven or microwave/convection oven of an RV. If you’re like me and love love love the smell of freshly baked cookies; you can freeze the dough! Scoop and place dough on a cookie sheet lined with parchment paper and pop them in the freezer for 30 minutes then put them in a freezer safe container or Ziploc bag. When you’re ready to bake, pull them out of the freezer and let them thaw a little before cooking. This is a great portion control option for me as I will only pull out how many cookies we will eat right then.
 Chocolate Chip Cookies
Recipe Credit: The Girl Who Ate Everything
- 2 cups all-purpose flour
- 1/2 teaspoon baking soda
- 1/2 teaspoon salt
- 3/4 cup unsalted butter, melted and slightly cooled
- 1 cup packed brown sugar
- 1/2 cup white sugar
- 1 tablespoon vanilla extract
- 1 egg
- 1 egg yolk
- 2 cups semisweet chocolate chips
-
Preheat the oven to 325 degrees. Line cookie sheets with parchment paper.
- Melt butter.
-
While butter is cooling, sift together the flour, baking soda and salt. Set aside.
-
In a medium bowl, cream together the melted butter, brown sugar and white sugar until well blended. Beat in the vanilla, egg, and egg yolk until light and creamy. Mix in the sifted ingredients until just blended. Stir in the chocolate chips by hand. If your butter was still hot when you added it your dough may be really wet at this point. Let it rest at room temperature for a couple of minutes if this is the case and then it will be cool enough to scoop into cookies.
-
My way: scoop and place dough on cookie sheets and bake 9-10 minutes (my oven cooks slow, your time may be shorter), rotating/turning cookie sheets halfway through baking time. Her way: Roll a scant half-cup of dough into a ball. Holding dough ball in fingertips of both hands, pull apart into two equal halves. Rotate halves 90 degrees and, with jagged surfaces facing up, place formed dough onto cookie sheet (Or just put a dang ball of dough on the cookie sheet and roll it taller than wider!). Bake, reversing position of cookie sheets halfway through baking, until cookies are light golden brown and outer edges start to harden yet centers are still soft and puffy (approximately 11-14 minutes). Do not over bake.
-
Cool cookies on sheets until able to lift without breaking. Transfer to a wire rack to cool.
I hope you enjoy these delicious morsels as much as we do. May they last longer in your house than they do ours.
